Pressure Canning
Pressure canning is a very specific form of preservation. I take it very seriously and anyone considering trying it should absolutely do the same. I have been pressure canning for about 4 years now and I am always grateful it was a skill that, although apprehensive about, I finally mastered (with a little push from the husband). The following will be a step by step of how to pressure can including the proper sites for reference materials regarding your altitude and associated pressure gauge settings. As always, read the manual and follow the instructions to the very last letter. There are plenty of renegade canners out there and I have heard more than my share of horror stories to know better. So lets get started!
Step-by-step process:
This process is based on my altitude of 600ft above sea level. I have a weighted gauge which calls for 10 lbs. of pressure for the recipes I can. Your altitude dictates the pressure at which you will can and the pounds utilized if you choose a weighted gauge canner like this one. There are a a few types of pressure canners. Weighted, Gauge, weighted and gauged. The manual and/or online resources listed below can list the protocol for the canner you choose to use.
The Canner I own is the All American Standard 30 Qt. Pressure Canner: https://www.allamericancanner.com/All-American-30-Quart-Pressure-Canner.htm
1. Prepare Jars and Lids:
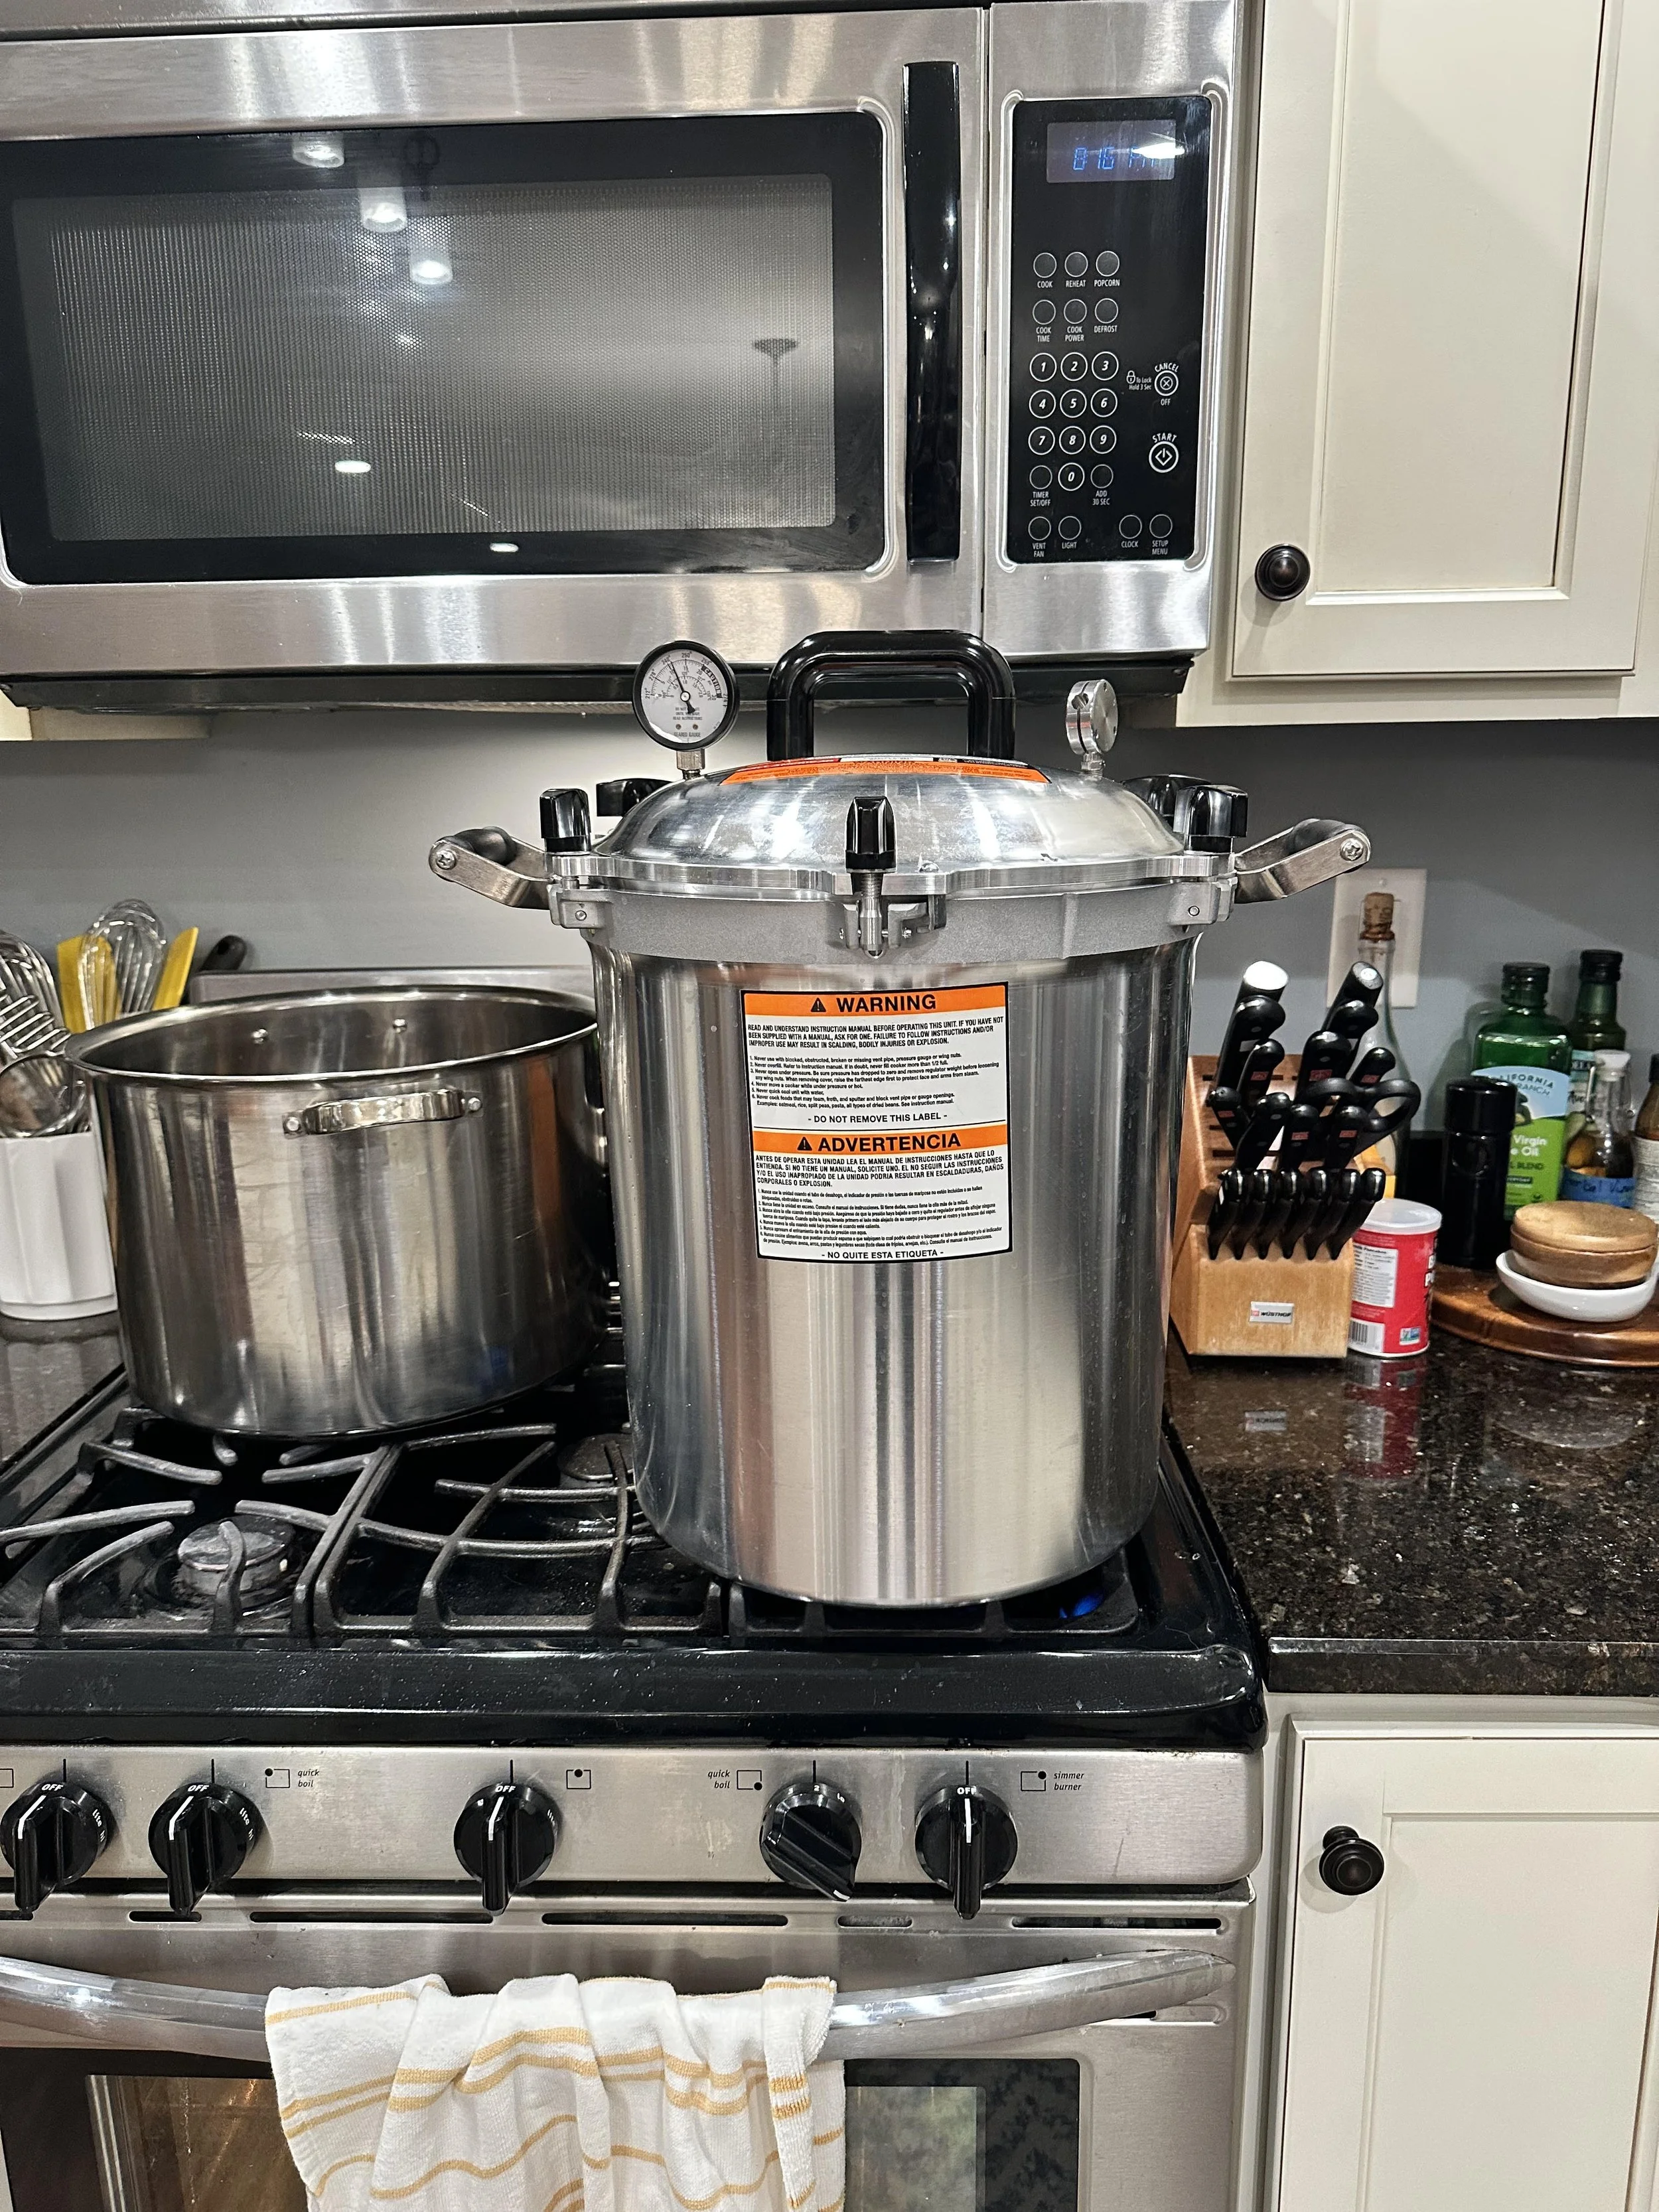
All American Standard 30 Qt. Pressure Canner
Wash thoroughly:
Clean jars and lids with hot, soapy water, ensuring all residue is removed.
Inspect for damage:
Check for cracks or chips on jars and lids, discarding any that are damaged.
Sterilize (if needed):
Depending on the recipe, you may need to boil jars in water for a specific amount of time to sterilize them.
2. Prepare Food:
Add a little extra !
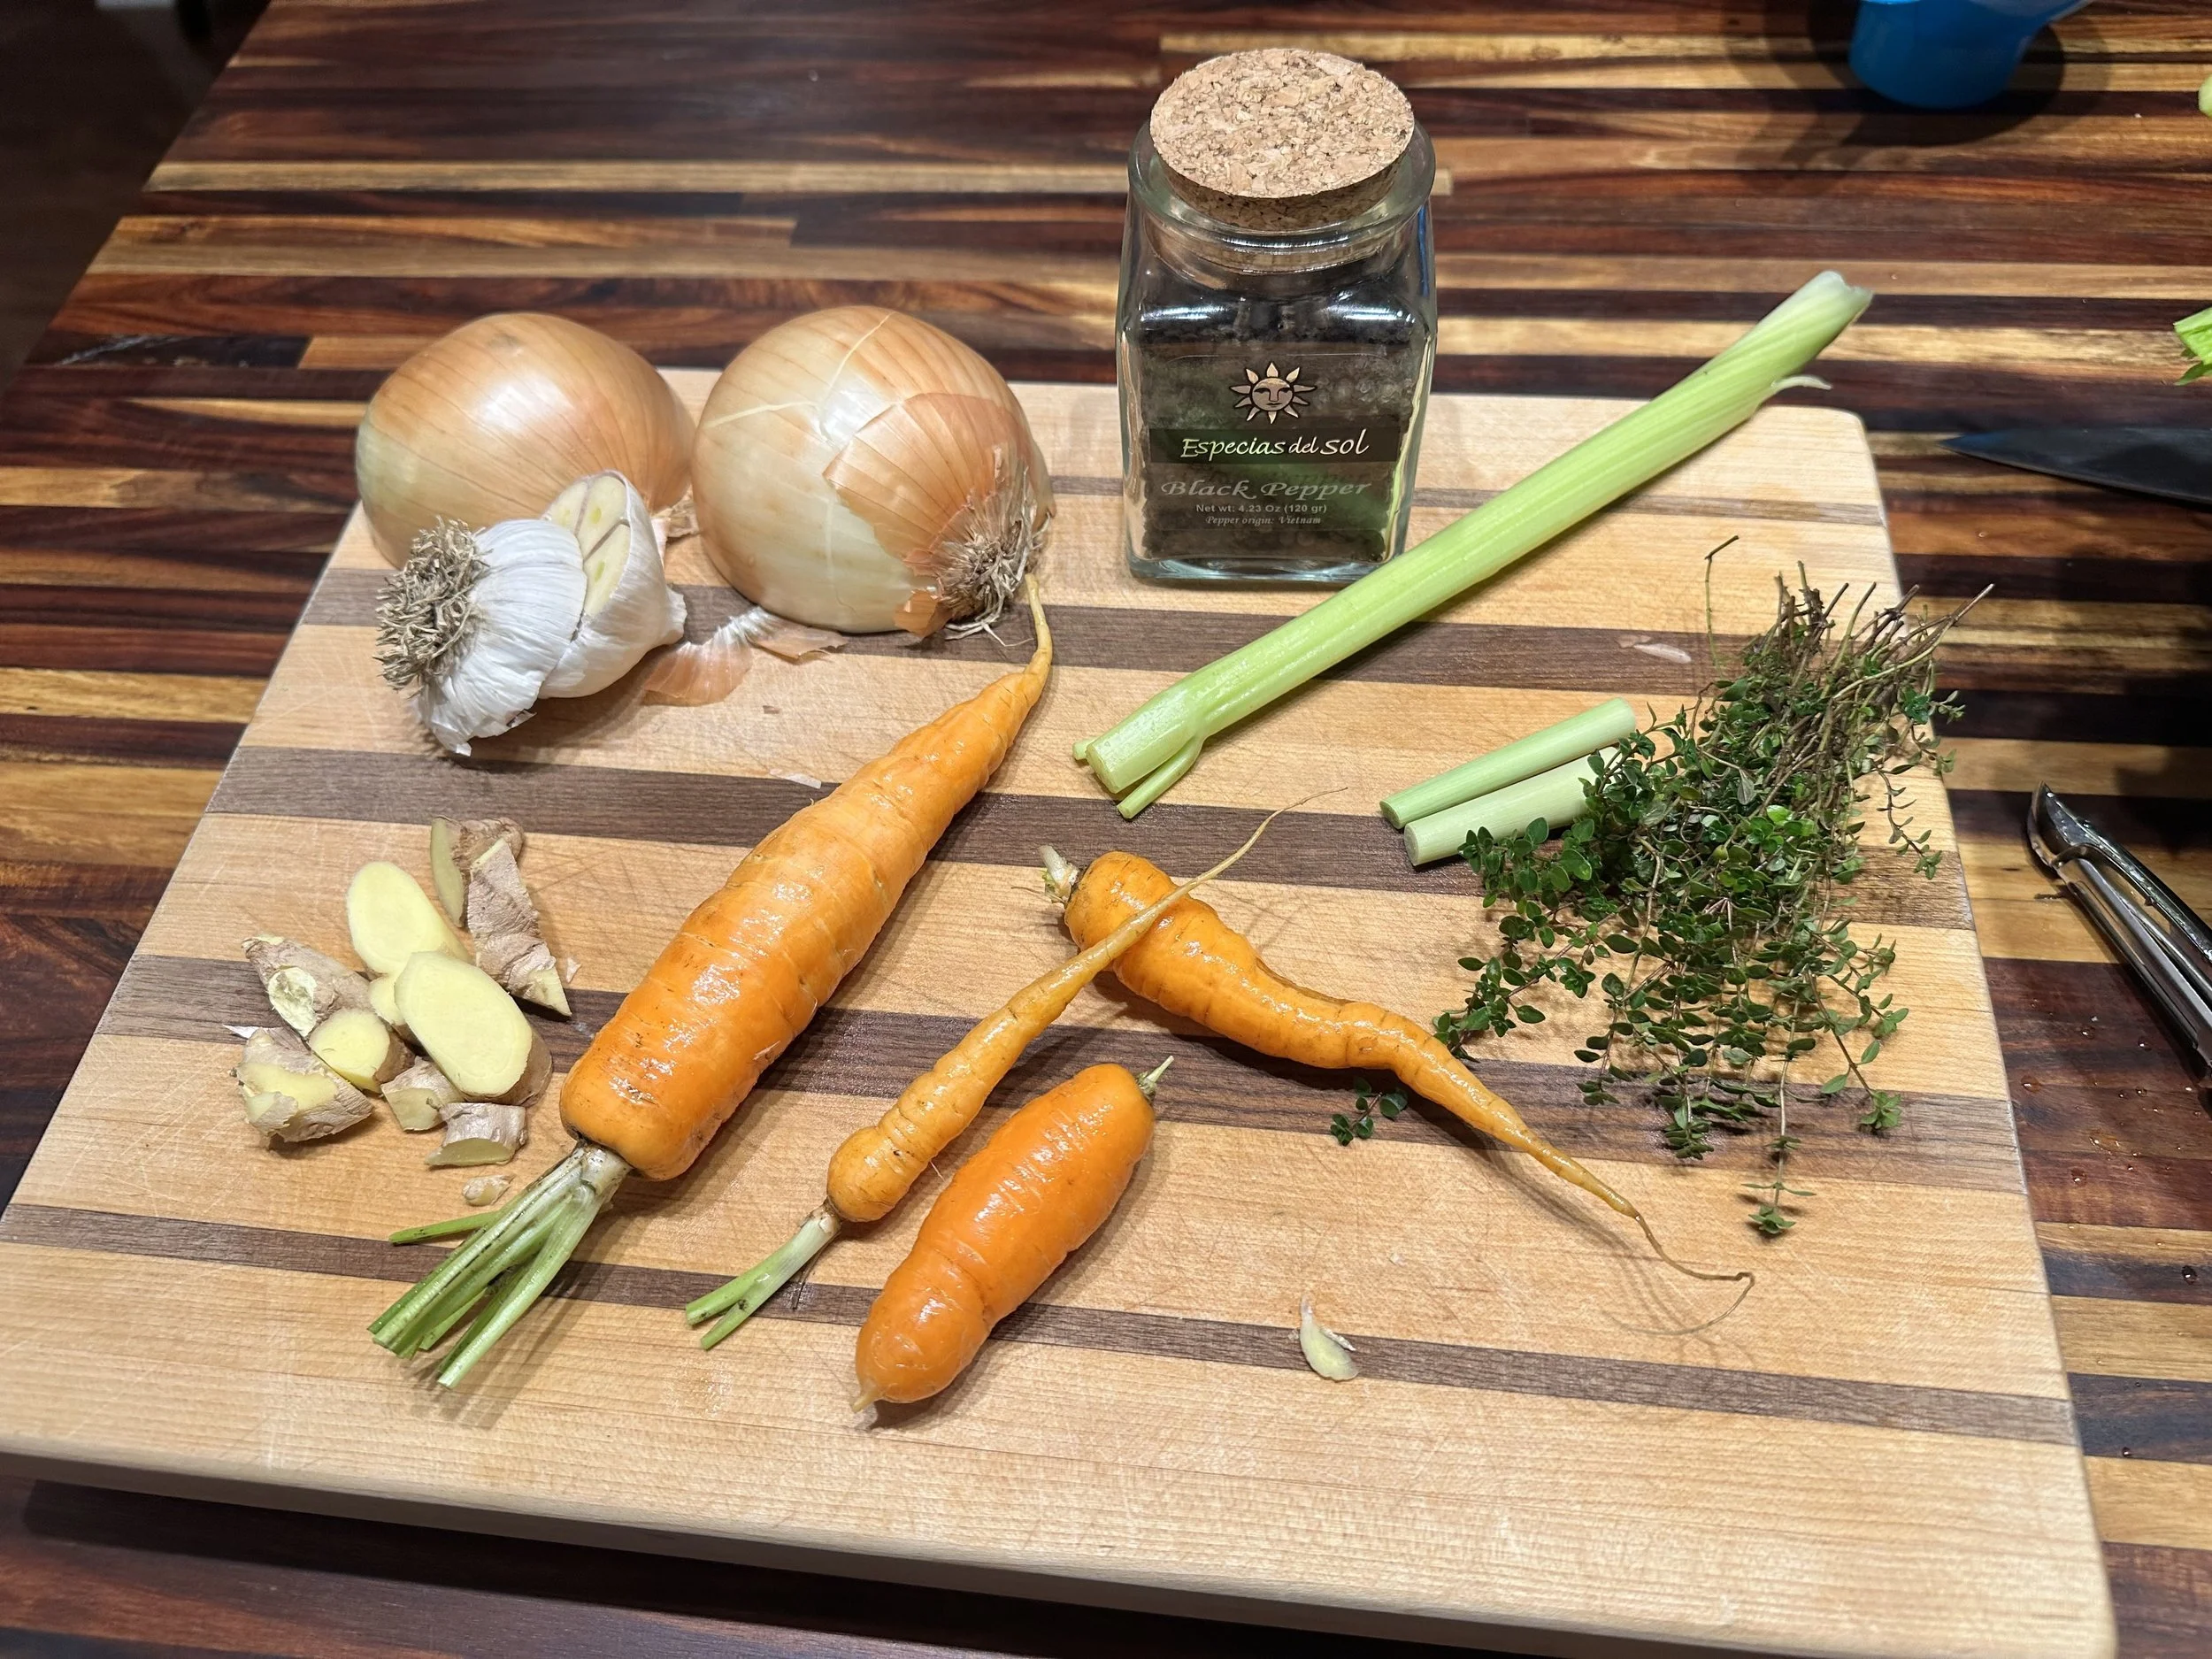
Ingredients for stock are paramount. The chicken parts bring the body but the vegetables, aromatics and spices bring the depth. I use ginger, lemongrass and turnips in addition to the traditional stock ingredients. These little extras create a nuance in the resulting stock that can not be described, only experienced.
Follow recipe instructions:
I chose to can chicken stock for this recipe. I did not add salt or seasonings.
Prepare food according to your chosen recipe, ensuring proper cooking and seasoning. I follow The Complete guide to Pressure Caning https://a.co/d/8Nk9Yy0
Pack into jars:
Fill hot jars with hot food, leaving the required headspace (the empty space at the top of the jar) specified by the recipe. Usually 1 1/2-2”.
3. Remove Air Bubbles:
Run a utensil around the edge:
Use a clean, non-metal utensil to gently run around the inside of the jar to release any trapped air bubbles.
Wipe jar rims:
Wipe the jar rims with a clean, damp cloth to remove any food particles that could interfere with sealing.
4. Secure Lids:
Place lids on jars: Center the flat lid on the jar rim, ensuring the gasket is properly seated.
Apply bands: Screw on the canning bands finger-tight, not too tight.
5. Load the Canner:
Add water to canner: Place a canning rack inside the pressure canner and add 2-3 inches of water. If canning more than 7 32oz jars, insert the second rack and stagger remaining jars.
Place jars in canner: Carefully arrange jars in the canner, leaving space between them. If you have a canner than can be double stacked stagger the jars on the bottom and top to ensure proper pressurization
6. Process in Pressure Canner:
Seal the canner:
To ensure full seal, dip your finger in any food grade oil and run it around the top rim of the canner base. This will minimize any gaps and create a tight seal. Secure the lid on the canner by lining up the arrow with the lid then turn lid to secure contact. In a star formation, flip knobs up and secure finger tight at first and then go back through and tighten again.
Heat and vent:
Turn on heat. Gas or ceramic ranges can be used to pressure can. Follow stove manufacturers instructions for weight limitations for ceramic tops as having more than one pressure canner in use at a time may not be recommended. Allow steam to vent for the recommended time until there is a continuous stream.
Reach pressure:
Once steam is venting in a continuous stream add the pressure gauge. The pressure will begin to build, reaching the required pressure level as indicated by your canner gauge. Once the pressure is reached the weighted gauge will experience its first “Jiggle” (video below)
Process for specified time:
Once the correct pressure is reached, start the processing time according to your recipe.
7. Cool and Release Pressure:
Turn off heat:
Once processing time is complete, turn off the heat and allow the pressure to naturally decrease to zero.
Carefully release pressure:
When the pressure gauge reads zero, remove the weighted gauge with a hot pad and carefully set aside.
Wait 2 more minutes and then begin to unscrew the handles in a star formation, lifting the lid away from your face to avoid steam burns.
The jars will be hot and bubbling which is normal. Use your rubber jar tongs to remove the jars, placing on a thick towel on the counter to cool over night or at least 24 hours.
8. Check Seals:
Remove jars from canner:
Carefully remove jars from the canner and place them on a clean, dry surface
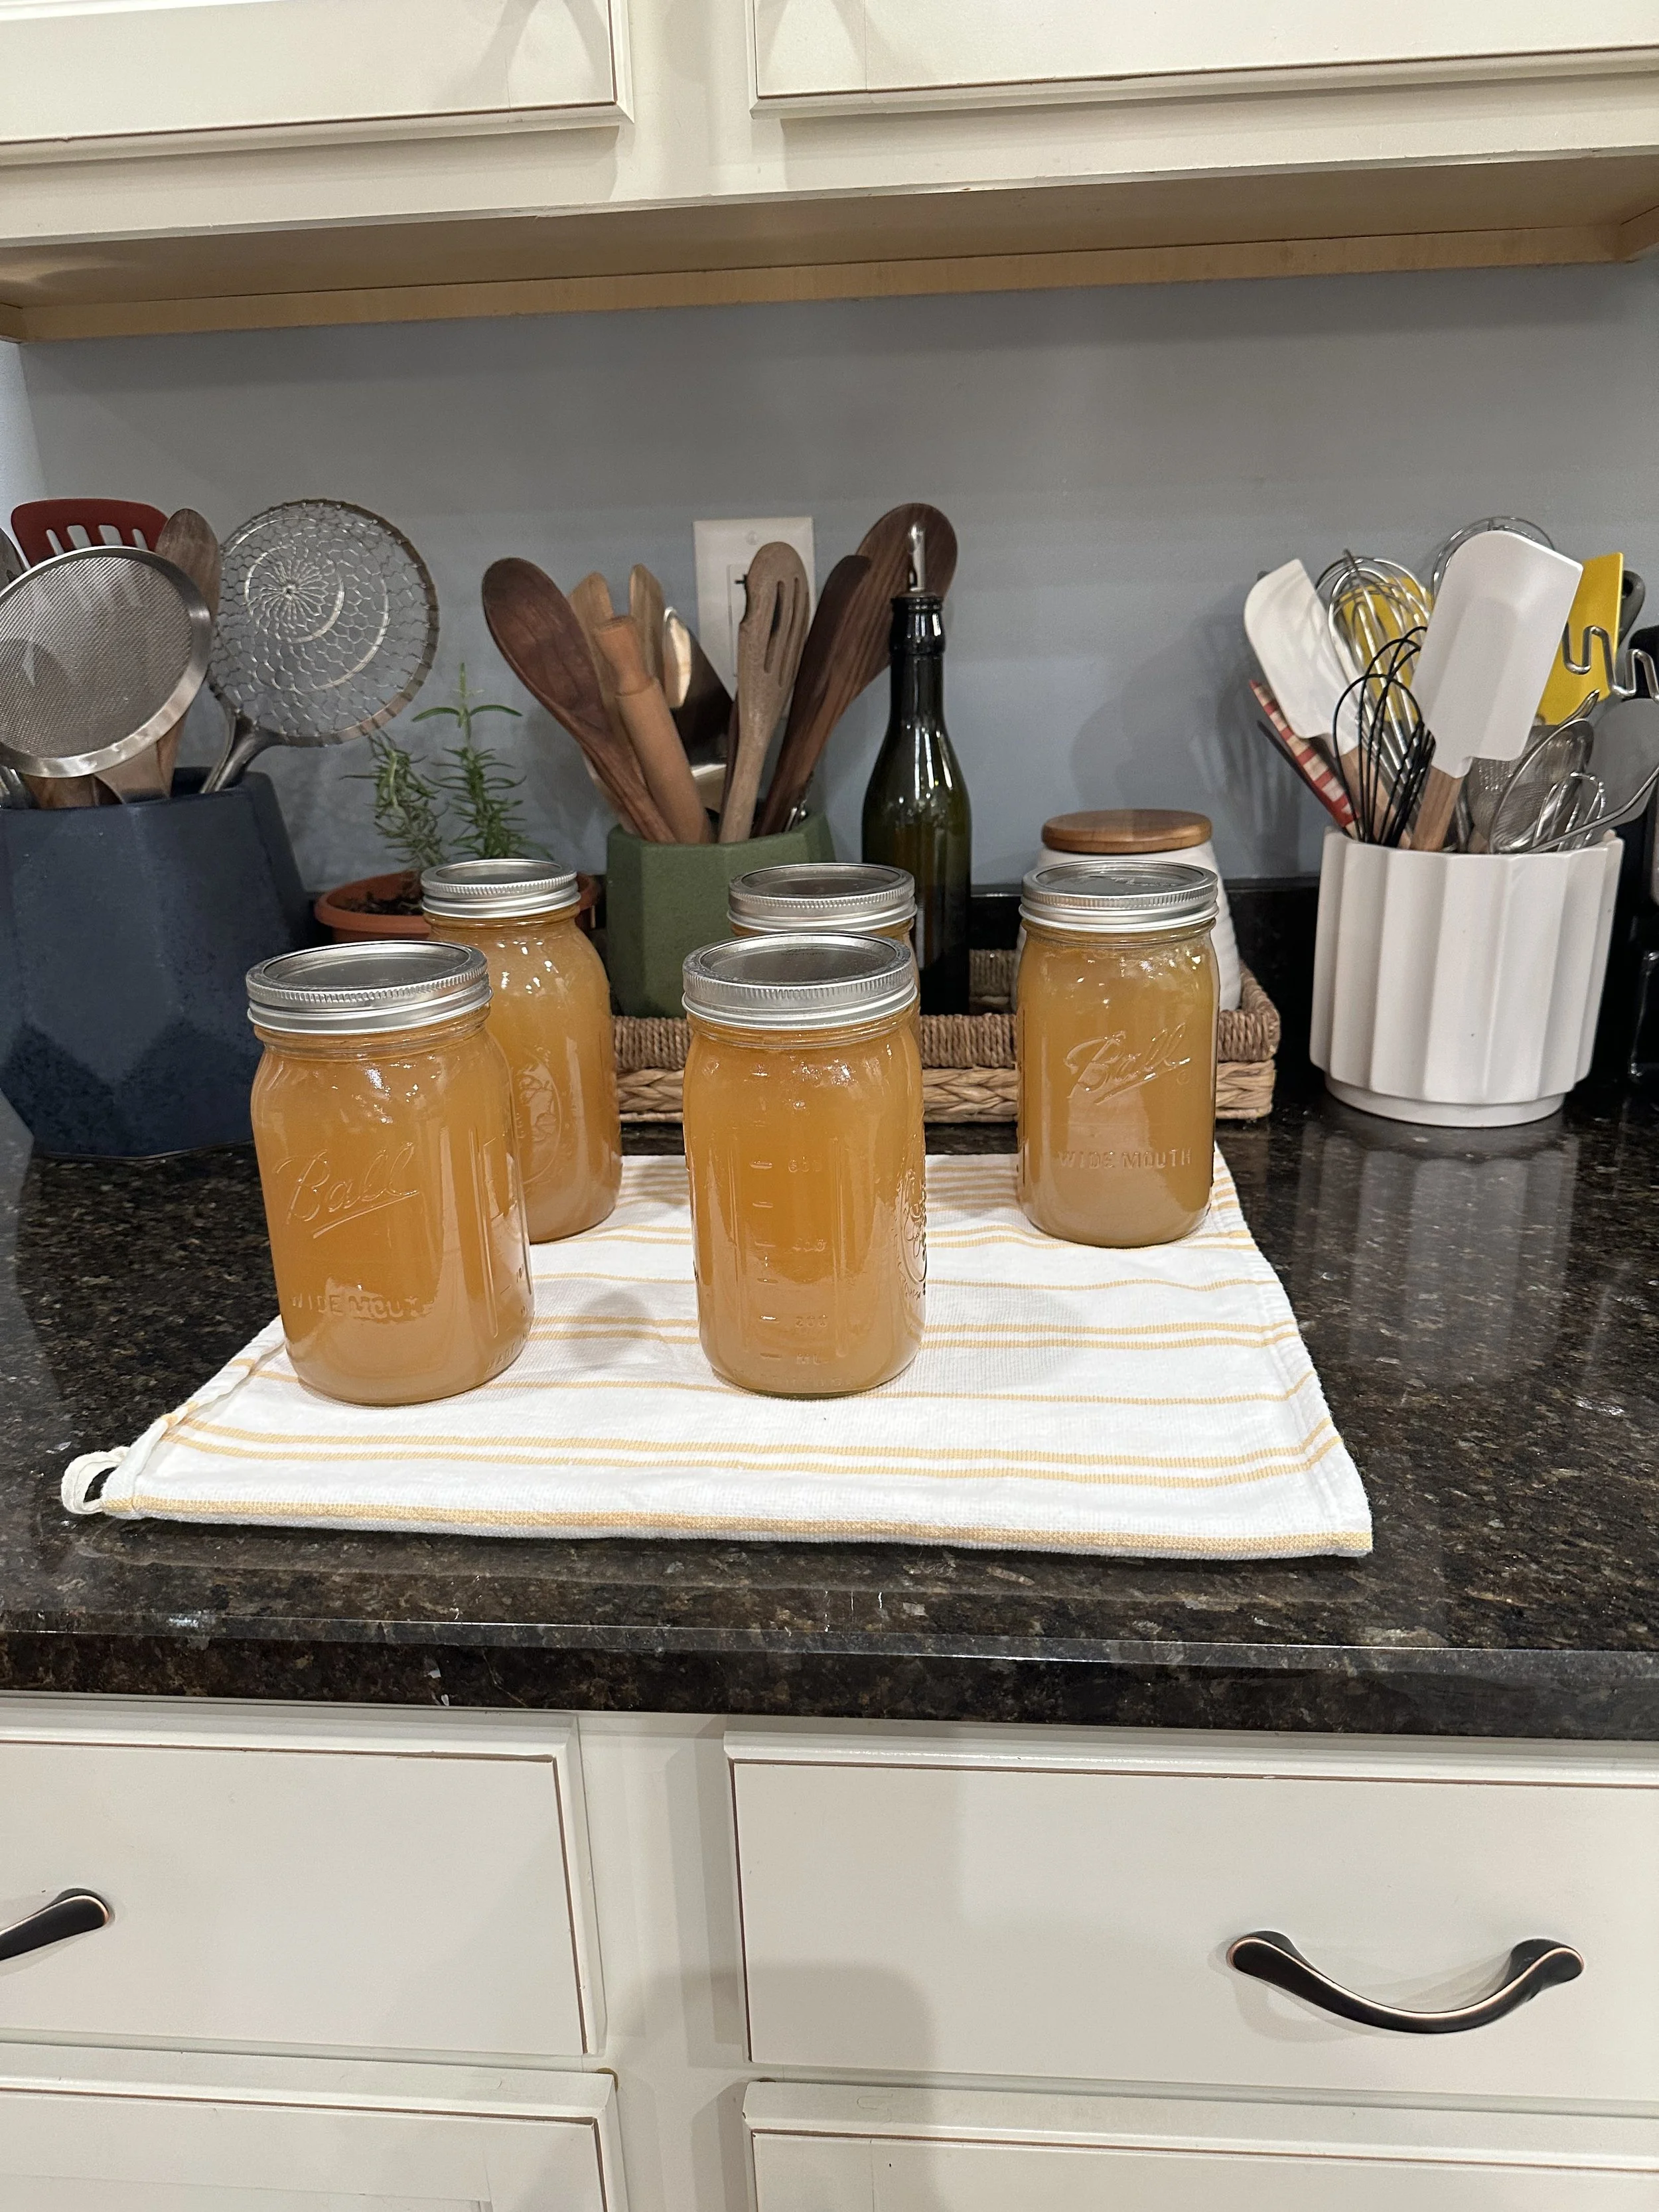
Golden Chicken Stock
This recipe is the “gold” standard in stock. This is light enough to sip when you feel under the weather and rich enough to use in your favorite soups.
One of the most important resources for information is National Center for Food Preservation.
https://nchfp.uga.edu/
Golden Chicken Stock Recipe
Ingredients:
Celery
Carrots
Leeks
Parsnips
Turnips
Garlic (entire head)
White onions
Chicken spines, skinless chicken thighs, wings and feet with nail tips removed (personal preference)
Fresh thyme
Fresh parsley
Whole peppercorns
Fresh ginger
Fresh lemongrass
Fresh dill
Scallions
Salt (optional)
Instructions on making Golden Stock
There are many ins and outs to stock making. Tiny tricks that give you that perfect result. I wont dive that deep in here ( maybe another time) but the quick and dirty is this:
Step 1: Wash all your vegetables and chop them up
Step 2: If using an already roasted carcass just toss straight in. If using uncooked you can do the same or cut the carcass up, exposing the marrow parts and roast them in the oven at 400 degrees for 45 minutes. toss in a neutral oil first.
Step 3: Bring everything up to a boil and then reduce down to a consistent simmer. Place the lid on halfway for venting.
Step 4: Let everything simmer for ~4 hours. Strain in a colander and then restrain using a nut milk bag or cheese cloth.
Step 5: Ladel into mason jars, wipe rims and secure lids finger tight. Load into pressure canner and follow recipe instructions for pressure and time.
These are the straight forward steps to take towards pressure canning chicken stock. Shelf stable for 3-5 years and of far higher quality then grocery store boxes.
If any of you have any specific questions feel free to email me or leave posts in the comments.